R/S Rock Smash Manip
Overview
After getting a handle on the basics of RNG, you might be interested in some Pokemon who cannot be obtained with standard wild RNG Manipulation. While niche, in Ruby and Sapphire there are two Pokemon who are exclusive to the Smashable Rocks. Nosepass, who is the main prize, and the Geodude line.
While a similar process to Static RNG, on most advances there are no Pokemon spawns, so calibration can be challenging. In addition, rock smash rocks count as randomly moving NPCs, so you may run into issues with extra random noise.
Recommended Setup
Hardware Requirements
-
Pokemon Ruby or Sapphire with a Dead Internal Battery (any language)
GameBoy Advance, Gameboy Player, Nintendo DS / DS Lite, GBA Emulator, or Pokemon Box Ruby & Sapphire. -
Windows 10/11 PC
In-Game Requirements
-
At least one free space in your party.
-
Pokeballs to capture it, if it's a capture. Masterball is preferred.
-
Pokemon to aid in capture, such as a false swipe user or a spore user.
-
5-10 Rare Candies. (Not 100% Needed, but helpful).
Tools Used
Video Examples
The Guide
Pick your target
The first thing we have to do is pick our target Pokémon. Open the Ten Lines website, and select the Calibration tab.
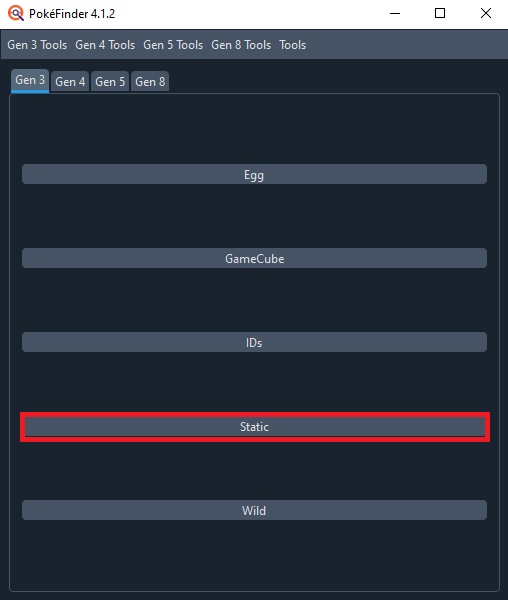
You will be on a new tab. Here, we've got some settings to fill out.
For Game, select Ruby Painting Seed or Sapphire Painting Seed, whichever you're playing. Painting Seed refers to a more difficult technique, that will be covered in Advanced, but I will cover how to use this website without doing that.
For Console, select whichever you're playing on. I am on a GBA for this tutorial, but the process is the same across all systems.
For Target Seed we'll put 5A0, this is the default seed for Ruby & Sapphire with a Dead Battery.
Seed+- & Offset should be set to 0.
Leave Minimum Advances alone, but change Maximum Advances to 100,000.
Input your Trainer ID & Secret ID into their respective fields. If you don't have yours, I covered how to manip it here.

For Method, choose Wild 1.
Set Category to Rock Smash.
For the Location, you should select the one that has the Pokemon you
want to RNG Manip. There's only three available from Rock Smash in
Ruby & Sapphire, so I'll list them out here.
If you want Nosepass, choose Granite Cave BF2.
Geodude is in every location on this list, and Graveler is only
in Victory Road BF1.
After your location is selected, select which Pokemon you want from the
dropdown menu. Also check the Filter box next to it, which makes Ten Lines only search for that species.
Select the IVs & Nature, you want. And also select if you want a Shiny.
I will just be going for a simple Shiny.
Shiny is set to Star/Square, which will show every potential Shiny.
Star vs. Square doesn't matter in any game other than Sword & Shield,
but Pokémon transferred from Gen 3 up to those games will retain their
Star/Square Shiny status.
Once your fields are set, click Submit. You should get several results, and have a window that looks like this:
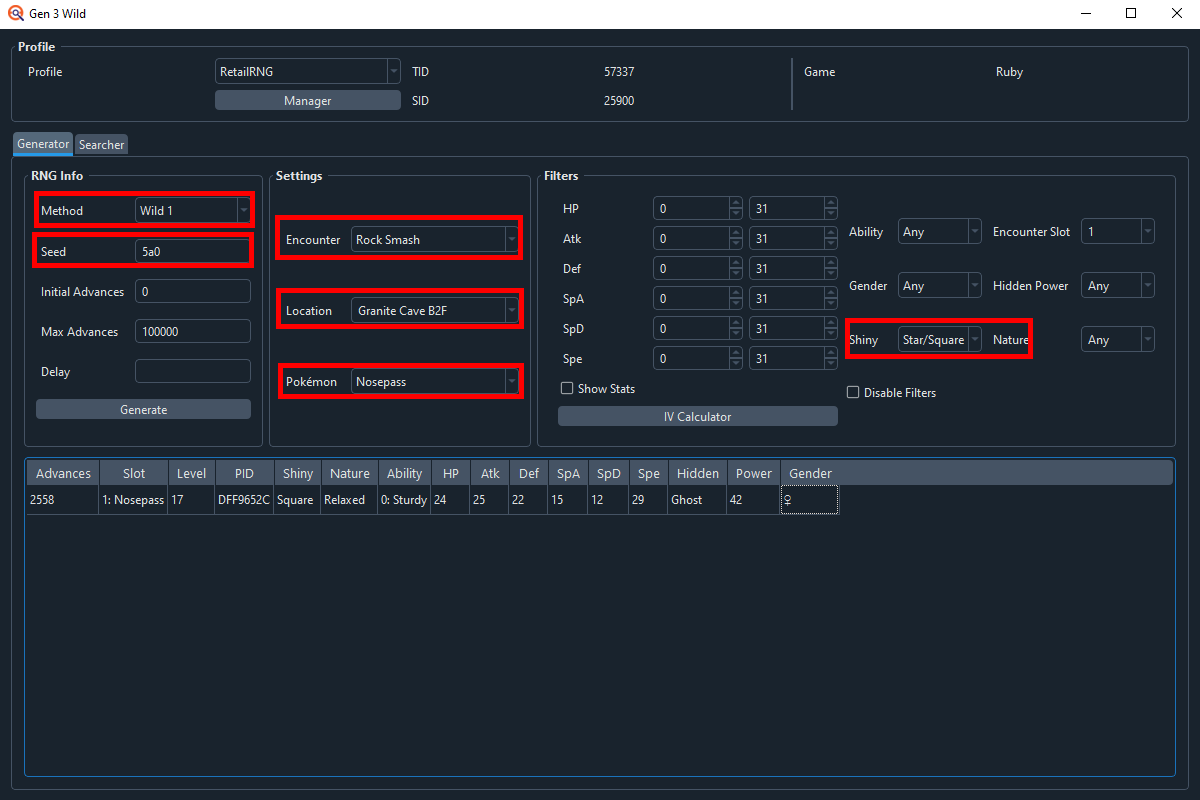
If you get no results, that means no Pokemon within 100,000 Advances exists, which is about a 26 minute period of time. There are ways to circumvent this issue, but they are difficult techniques covered in our Advanced section.
In the meantime, if you have none, loosen your restrictions on what you want. Accept some worse IVs, or a Worse Nature, no shiny, etc.
I will be aiming for Advance 2559.
With our target picked out, we can move onto the Rock Smash Manip!
Rock Smash Manip
To get started with Rock Smash RNG Manips we need to head to our targets
location & destroy every rock but 1. In my case, I am going for
Nosepass, so we'll head to BF2 of Granite Cave.
Here you can see what the area typically looks like.
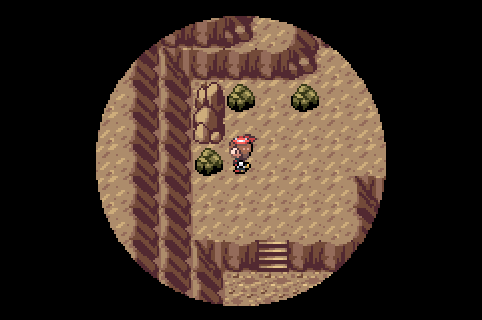
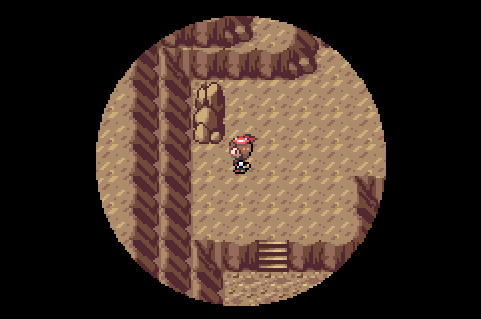
And here is what it looks like after I finished prepping.
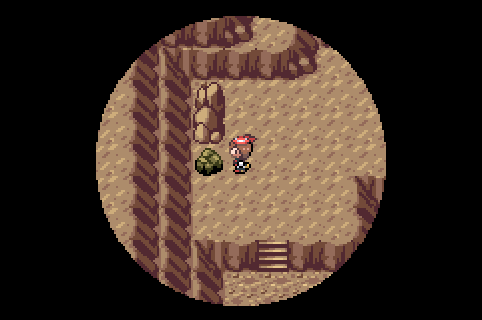
I even broke the rocks that are off screen.
Note: Spinning NPCs
Typically NPCs do not interfere much with basic & intermediate RNG Manips in Ruby & Sapphire. And even if they did, there is not much you can do about them. But, for Rock Smash, NPCs can be active & moving during the animation, and each Rock Smash rock counts as an NPC who spins in a random direction.
There's several interaction objects that do this, and you should do your
best to remove them from the screen if you can.
The list is as follows: Rock Smash Rocks, Strength Boulders, Cut Trees,
Visible Items (shaped like Pokeballs), and Invisible Kecleons.
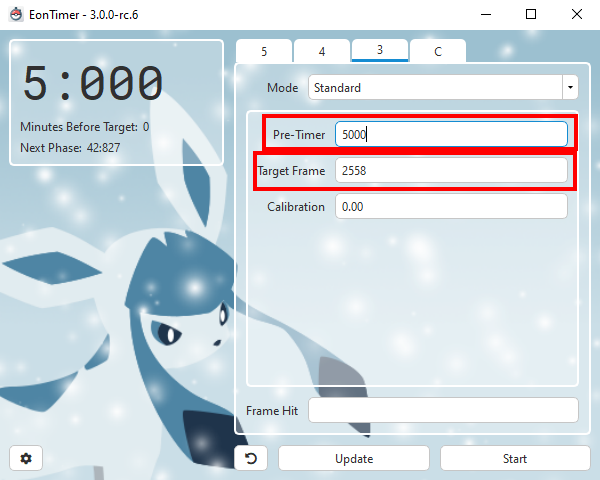
Then, in Eon Timer, put the number from the Advances Column into the Target Frame box in EonTimer. In my case, it is 2558. Also, make sure the value in Calibration is 0.
For every type of Manip, the amount of calibration will be different, because the game delays generating whatever you're manipping differently, based on what it's generating.Your Eon Timer should look something like this, but with your target advance instead.
Pretimer is optional.
When set to 0, clicking Start on EonTimer will immediately start the countdown to your target Advance. This requires you to soft reset your game at the same time as clicking Start on Eon Timer.
Setting this to 5000 will create a 5 second countdown, which you will soft reset the game to, then the countdown for your Target Advance Begins. I'll be using this method for the remainder of the guide.
Also make sure to double check your console in EonTimers settings!
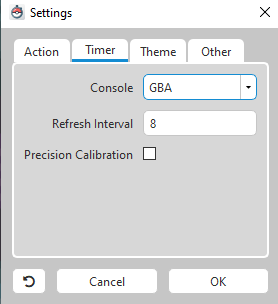
I selected GBA, since I am doing this on a Gameboy Player. But if you're on a DS or DSLite, select NDS- Slot 2
At this point, we're ready! Click Start Eon Timer, and when the pretimer finishes on the 6th beep, soft reset the game.
While Eon Timer counts down, immediately talk to the Rock and use Rock Smash. Go through the dialogue and wait on the X used ROCK SMASH. Dialogue box, which is the final one.
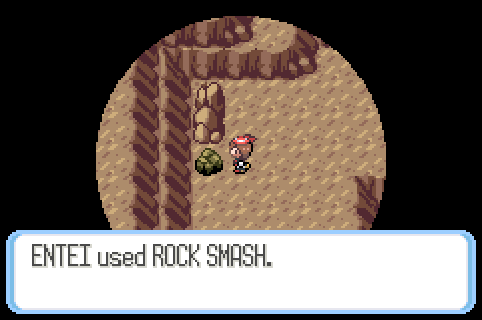
You most likely got no encounter! So, what do we do about this?
This is the challenging part. What we have to do is increment our target
advance by a random amount until we hit ANY Pokemon. That will give
us enough intel to do our calibration.
You can go by 1, by 16, any arbitrary number. We're changing the Target
Frame box in Eon Timer for this.
I went 1 by 1 until I was on advance 2576 and saw a non-shiny Nosepass!
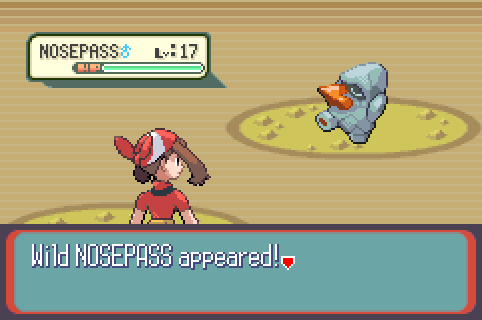
Once we get a Pokemon, we need to catch it. After that, we're going to have to check the Pokemons summary screen to figure out what RNG Advance we landed on.
It's worth mentioning, if you have one, just use the Masterball for this catch. You will not be keeping the Pokemon, so it just speeds the process up.
Once you can view the Pokemons summary screen, we can move onto how to adjust.
Rock Smash Adjustment
To figure out which Advance we hit, we're going to have to figure out its IVs and use that to search.
First, though, let's set up Calibration for a search.
We’ll leave Game, Console, Seed, Seed+/-, Offset, and Method alone, but we are going to change Minimum Advances. To be about 1000 advances before our target.
In my case, I am aiming for 2576. So I set it to 1576. Also set Maximum
Advances to 3576. This will generate Pokemon spreads from 1000
Advances before your target, and 1000 after it.
Select which Pokemon you received. In my case it's Nosepass. Also be sure to keep the Filter Box checked so Ten Lines only searches for that species.
All IVs should be 0 to 31, and the shininess of the drop down should say Any. Set Nature to what the Pokemon you received had. In my case it's a Timid, Nosepass.
Once you select a Nature, the IV Calculator function will appear.

The IV Calculator wants you to input your Pokemons level, then stats. If it is highlighted red at all, that means you've made a typo or forgot to enter something.
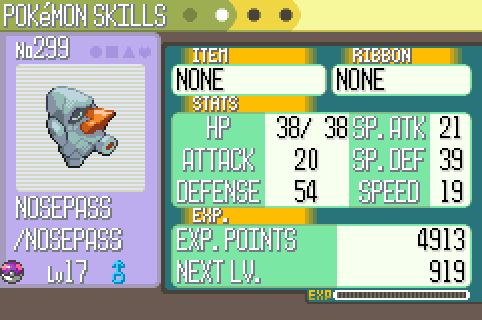
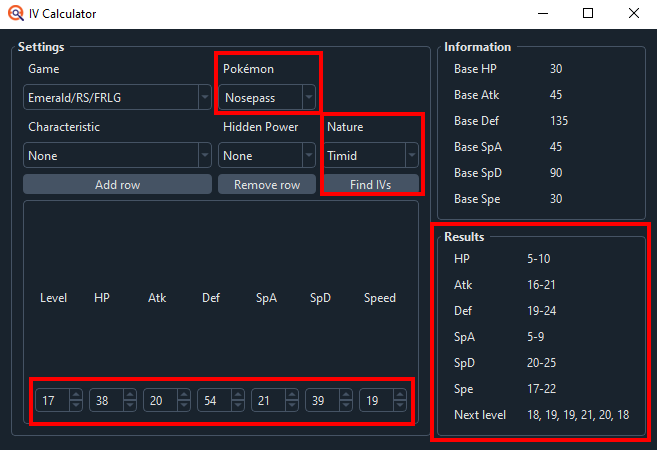
If you have Rare Candies to raise the Pokemon's level, we can make the
IV Ranges even more Precise. We aren't keeping this Pokemon, so it's
safe to use them to gain info. They will come back when we soft reset!
To account for the extra level, push the Enter/Return button on your keyboard, and a new
row to enter the information for its next level will appear.
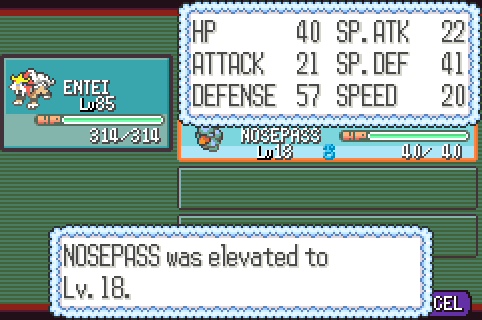
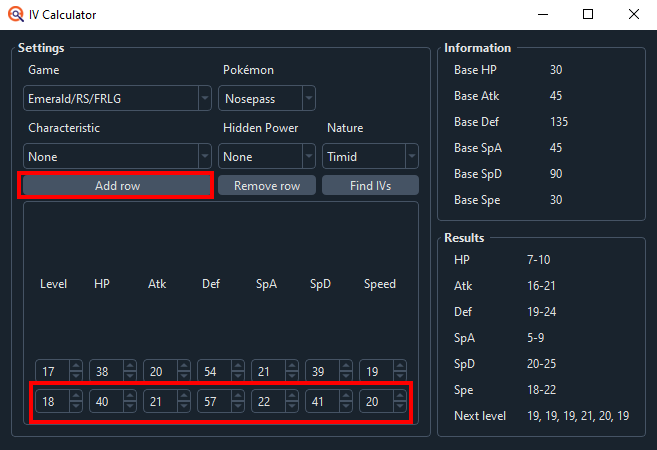
Once you finish entering them, the IV Filters in Calibration will be populated with a range of potential stats of your Pokemon.
At this point, hit Submit. You should only get one result. If you get more than that, you can narrow down the results further by doing more levels in the IV Calculator.
If you do not have ANY rare candies and have more than one result, it's generally fine to assume you hit the closest Advance to your target.
If nothing comes up, make sure to check the other wild Methods.
If you still have no results, expand your search range by decreasing
Initial Advances by 1000, and increasing Maximum Advances by 1000,
and click Submit again. Do this until you get at least 1 result.
In my case, I had to change the drop down to Wild 4 to get a
result.
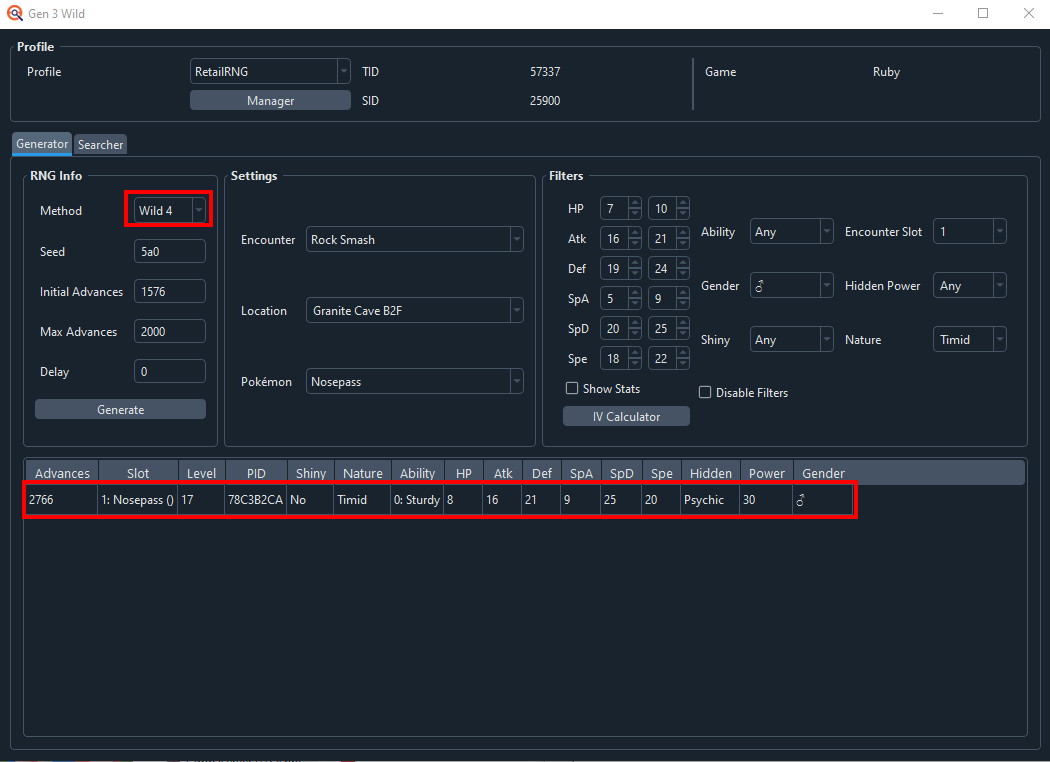
Now we need to calibrate. You may notice this is quite a distance away
from your target! I had 2576 in EonTimer, but this Nosepass spawned
on 2766! That's a 190 Advance difference. So, what we'll do is
put that into the Offset box in Ten Lines. Then, we'll clear all our
fields except for Shiny, which we'll set back to
Star/Square.
Change the Pokemon back your target species, but keep
Location & Encounter the same.
Change Method back to Wild 1 if you have to, leave
Seed as 5a0, change Initial Advances back to 0, and
Maximum Advances back to 100,000.
Then click Submit!
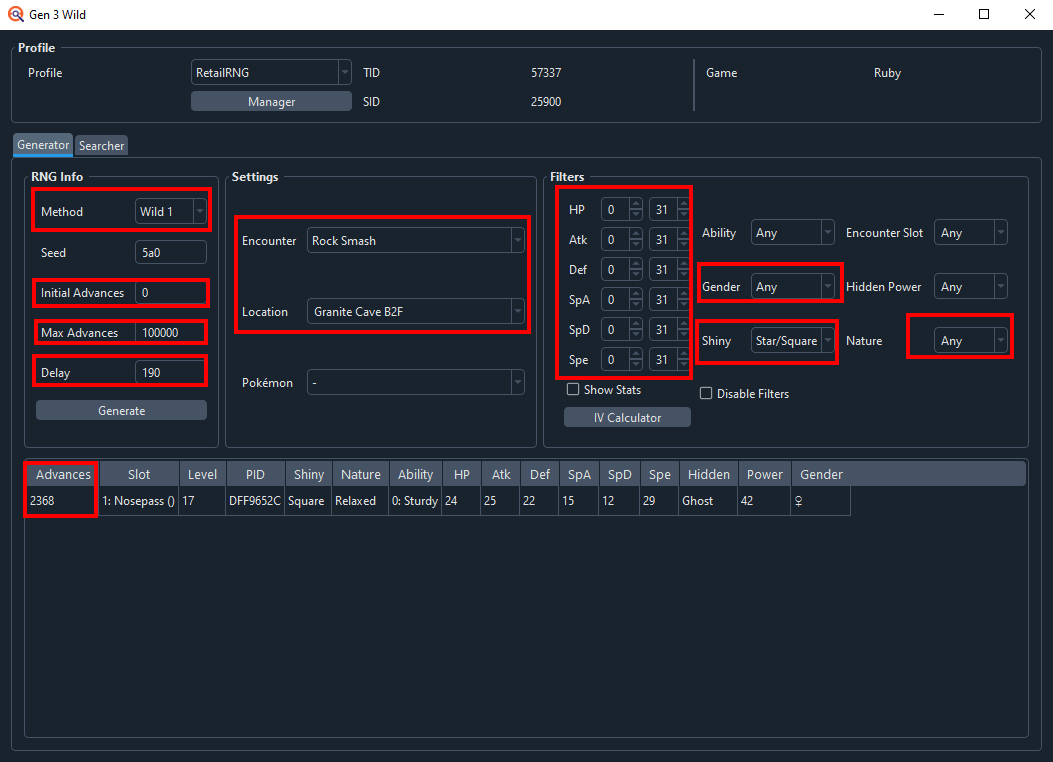

You'll see the same target Pokemon you aimed for earlier, but the Advances are different! This is our new target we'll put into Eon Timer.
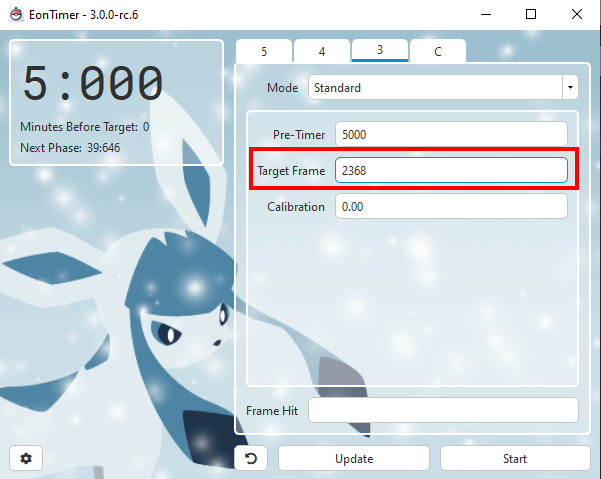
Now repeat the process from Rock Smash Manip.
If you get no Pokemon spawn, just go up or down an Advance in your
EonTimer target until you spawn something consistently.
You can see in Ten Lines, if you set shiny to any & look around your
target, that not every advance spawns a Pokemon.
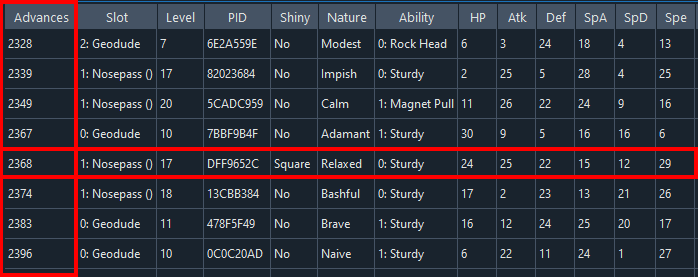
If you get a Pokemon & it's not shiny, we can repeat the calibration step. Catch a Pokemon, calculate its IVs, and find where you landed.
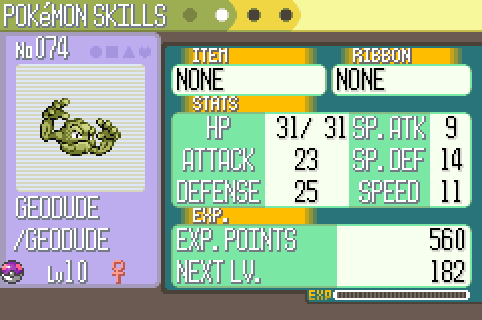
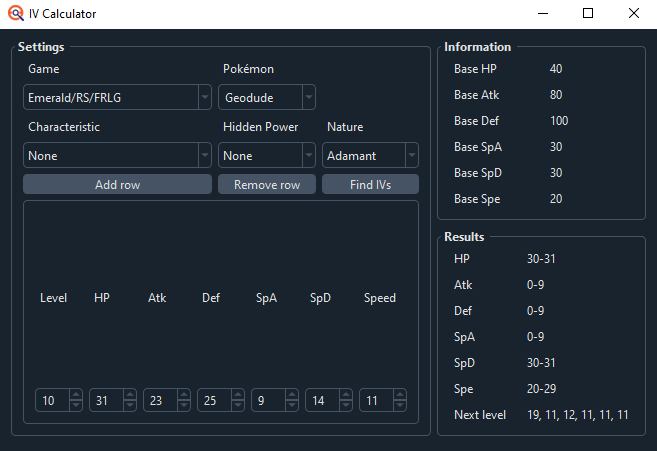
We can see here that I hit 1 Advance early! So, I'm close!
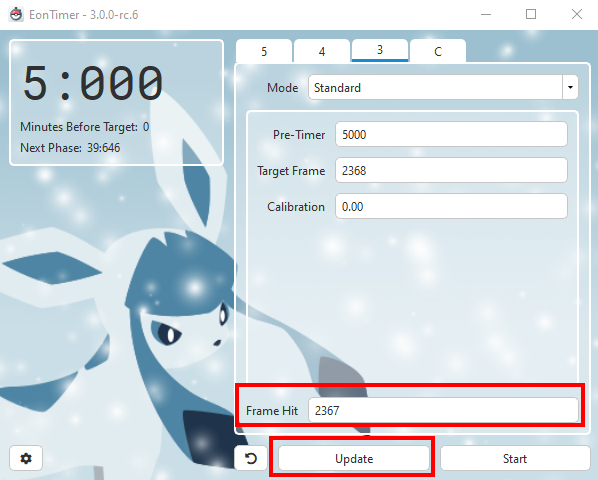
This time, put what you hit into EonTimers "Frame Hit" box rather than doing the more complicated adjustments we did earlier. Click update, and try again!
Eventually, with enough attempts, you will land on the Pokemon you are aiming for. This is a bit more tedious than other manips. Nosepass took me around 45 minutes to get with this methodology. And it's almost exclusively because of how long it took me to calibrate the rocksmash delay.
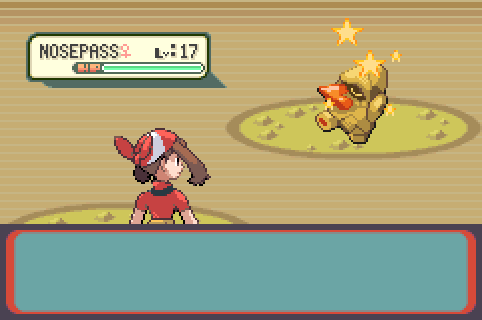
Note: Some tips!
If on the attempt after your adjustment run, you find you're only one or two Advances off, try not adjusting. 1 Advance is only 16 milliseconds, well within the margin of human error.
On the contrary, if you find yourself dancing around it, consistently
being 1 Advance early or late several times, try adjusting anyway.
Sometimes breaking out of the cycle, even if it makes you more late or
early, can help!
Lastly, have patience! This is a skill to hone, maybe it takes you 10,
15 tries now. But a couple weeks from now, maybe 5! Hope you're having
fun!
Next Steps...
Up next we'll be tackling the Safari Zone, and using it as a way to teach you the basics of Pathing in Ruby & Sapphire. This is something you really won't have to worry about in any other game!
Get the Pokemon you wanted? Consider supporting us on Ko-fi & keep us ad free!