R/S Wild Encounter Manip
Overview
After RNG Manipping your first Static Pokemon, you may be looking for some variety. Look no further than basic wild rng manips. While the general process is the same as Static (Start timer, Press A when done), you have a much wider variety of targets, and searching for what Advance you landed on is more difficult.
Wild RNG includes anywhere you can randomly find Pokemon by walking. This includes Grass, Surfing, Diving, & Caves. I will be excluding the Safari Zone from this guide, it is slightly more challenging for various reasons, and will be covered in our Intermediate section.
With that said, once you have mastered Static & Wild RNG Manips, you should move on to some more difficult manips.
Recommended Setup
Hardware Requirements
-
Pokemon Ruby or Sapphire(any language)
GameBoy Advance, Gameboy Player, Nintendo DS / DS Lite, or a GBA Emulator -
Windows 10/11 PC
In-Game Requirements
-
Save at the location of whichever Pokemon you wish to capture or receive.
-
Any Pokemon with the move Sweet Scent. The earliest available user in Ruby & Sapphire is Surskit on Route 102. But Oddish on route 110 is far more common, if you are willing to wait.
-
At least one free space in your party.
-
Pokeballs to capture it, if it's a capture.(Master Ball preferred)
-
Pokemon to aid in capture, such as a false swipe user or a spore user.
-
5-10 Rare Candies. (Not 100% Needed, but helpful).
Tools Used
Video Examples
The Guide
Pick your target
The first thing we have to do is pick our target Pokémon. Open the Ten Lines website, and select the Calibration tab.
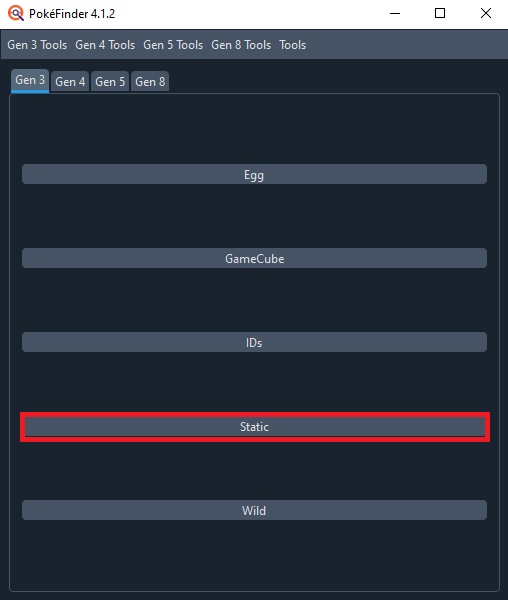
You will be on a new tab. Here, we've got some settings to fill out.
For Game, select Ruby Painting Seed or Sapphire Painting Seed, whichever you're playing. Painting Seed refers to a more difficult technique, that will be covered in Advanced, but I will cover how to use this website without doing that.
For Console, select whichever you're playing on. I am on a Nintendo DS for this tutorial, but the process is the same across all systems.
For Target Seed we'll put 5A0, this is the default seed for Ruby & Sapphire with a Dead Battery.
Seed+- & Offset should be set to 0.
Leave Minimum Advances alone, but change Maximum Advances to 100,000.

Note: Sweet Scent Offset?
In our Static RNG Guide, I covered why we do not list offsets anymore. But you may be wondering why not cover Sweet Scents Offset, since it should be the same everywhere?
The reason is because Sweet Scent's offset changes based on which
area you are in, and what game you are in. And again, learning how to
calibrate after missing your Target once is an important step in the
process.
In short- Don't stress about Offset. It's not useful to us, learning
how to Calibrate will teach you how to handle delays.
Input your Trainer ID & Secret ID into their respective fields. If you don't have yours, I covered how to manip it here.
For Method, Select Wild 1.
Note: What are Methods?
Methods result in different sets of IVs for a Pokemon, from the same RNG Advance. However, they have the same PID, which means they will still be Shiny and have the same Nature.
Which Method you get on a Wild Pokemon is, for the most part, out of the player's control
in Ruby and Sapphire. Wild 1 is the most common, but it's
possible to hit Wild 2 or Wild 4 instead-- so it's
important to check all three for Wild RNG manipulation.
Next, think of what Pokemon you want to RNG Manip, because its Species, Location, & Category will all be important to this section.
First is Category. We can choose between Grass & Surfing. Functionally, they are the same, but they have different Locations available to them. The Fishing Rods & Rock Smash will be covered in our Intermediate guides.
After we select Category, we will select our Location in-game where we want to catch our Pokemon.
Then, we select our Pokemon in the Pokemon Dropdown. In addition, check the Filter box. This will tell Ten Lines to only search for that species.
Select the IVs & Nature you want. And also select if you want a Shiny.
I will just be aiming for a simple Shiny Duskull on Route 121.
Shiny is set to Star/Square, which will show every potential Shiny.
Star vs. Square doesn't matter in any game other than Sword & Shield,
but Pokémon transferred from Gen 3 up to those games will retain their
Star/Square Shiny status.
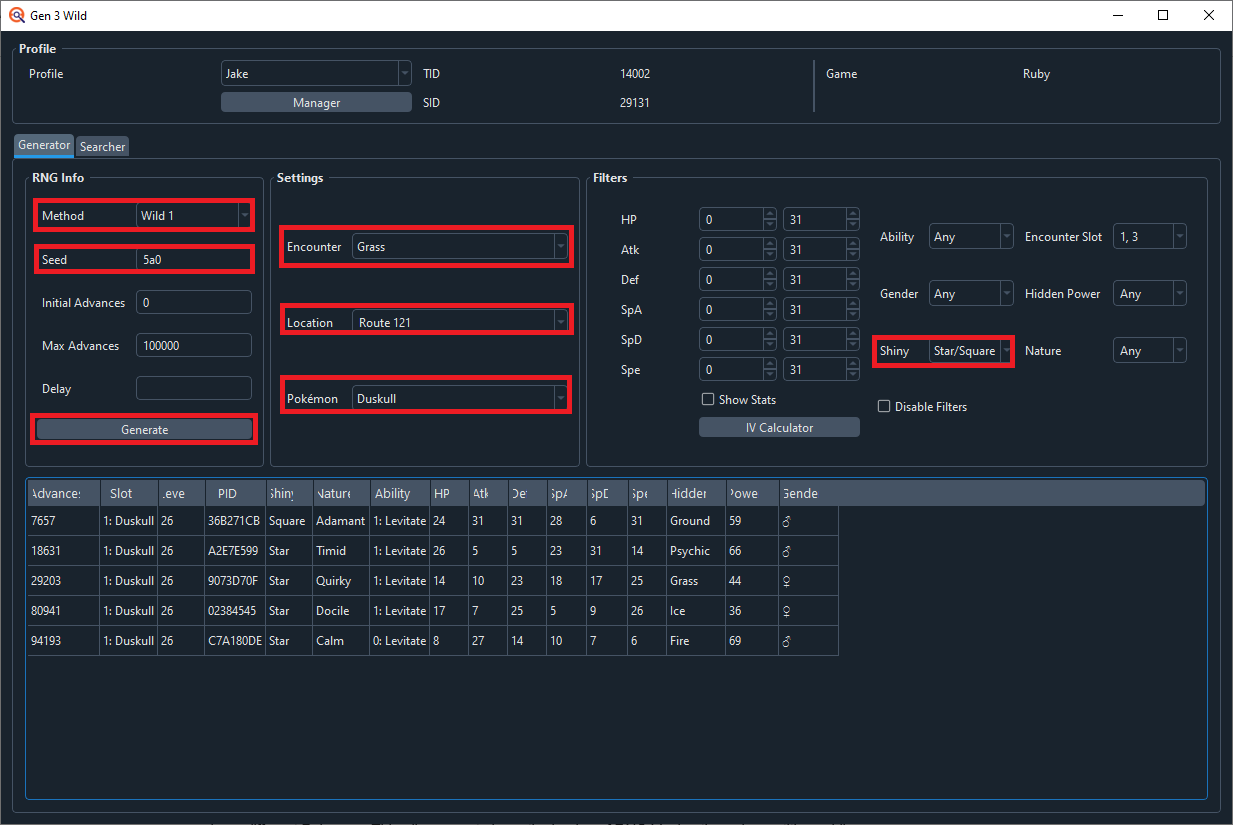
Once all your fields are set, click Submit. You should get several results, and have a window that looks like this:
It's worth mentioning that Wild RNG is not the same as Static
RNG in the sense that you will always have the same targets
available to you. Sometimes trainer IDs may produce multiple shiny
targets of different species on nearby Advances. So I encourage you
to leave the Pokemon Dropdown blank to see if you have any other
Targets available to you.
This Trainer ID unfortunately only has Advance 7657 available as a Shiny, which, while being a different Advance, is the same PID & IVs as our Starter / Static targets. You probably have the same PID available to you, but you also may not. It's up to you to investigate.
If you get no results, that means no Pokemon within 100,000 Advances exists, which is about a 26 minute period of time. There are ways to circumvent this issue, but they are difficult techniques covered in our Advanced section.
In the meantime, if you have none, loosen your restrictions on what you want. Accept some worse IVs, or a Worse Nature, Different Species, or Change Routes if your Pokemon is available on another one.
I will be aiming for Advance 7657. You can see here the earlier Advances I had available to me via Static RNG are missing. I only have the Adamant Target, so this is not 100% the same.
With our target picked out, we can move onto the Wild Manip!
Wild Manip
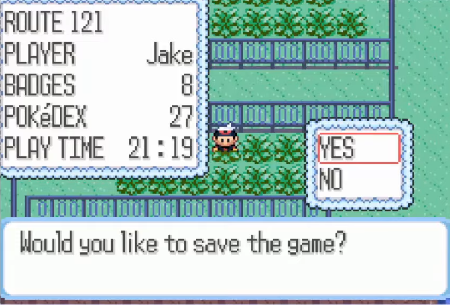
To get started with the Wild Manip, you want to save in-front in the Location you want to RNG Manip in. Here is me saved on Route 121. Your area in the Location does not matter.
Also MAKE SURE YOU HAVE A POKEMON WITH SWEET SCENT IN YOUR PARTY. In my case, I am using Oddish. You can use any Pokemon with that move.
Then, in Eon Timer, put the number from the Advances Column into the Target Frame box in EonTimer. In my case, it is 7657. Also, make sure the value in Calibration is 0.
For every type of Manip, the amount of calibration will be different, because the game delays generating whatever you're manipping differently, based on what it's generating. Your Eon Timer should look something like this, but with your target advance instead.
Pretimer is optional.
When set to 0, clicking Start on EonTimer will immediately start the countdown to your target Advance. This requires you to soft reset your game at the same time as clicking Start on Eon Timer.
Setting this to 5000 will create a 5 second countdown, which you will soft reset the game to, then the countdown for your Target Advance Begins. I'll be using this method for the remainder of the guide.
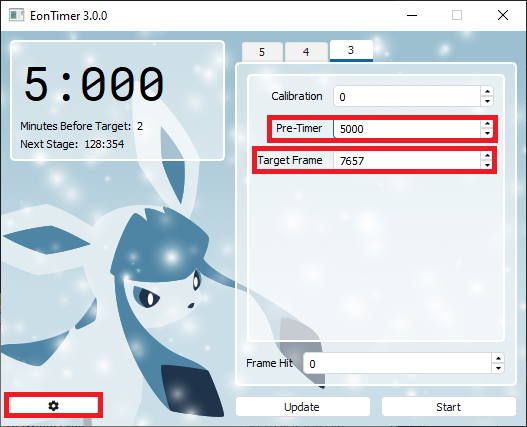
You should also click the gear icon, and make sure your console setting is correct. regular GBA and GBA Games on the DS have slightly different frame rates.
GBA: 59.7275 fps
NDS - Slot 2: 59.6555 fps
Having it set incorrectly will make longer timers inconsistent relative to the actual game. If you’re playing on unofficial hardware or emulator, stick with GBA as this is usually the default.
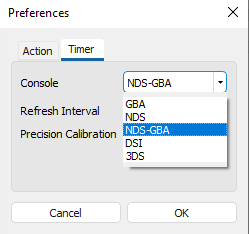
You don't need to touch Refresh Interval or Precision Calibration.
We are all ready to begin!
At this point, we're ready! Click Start Eon Timer, and when the
pretimer finishes on the 6th beep, soft reset the game.
Get to the overworld, and press Start to bring up the Menu. This will freeze any NPCs nearby, who may cause extra unwanted RNG Advancements.
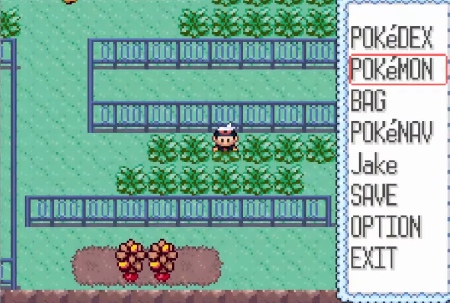
Then, head into your Pokemon Menu. Press A on your Sweet Scent user, and hover over the Sweet Scent option.
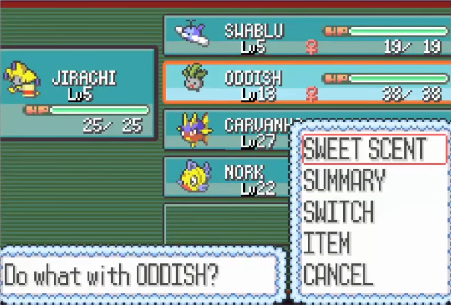
Then, when Eontimer gets near the end of its countdown, it will beep 6 times. The goal is to press A on the 6th beep to start the encounter using Sweet Scent.
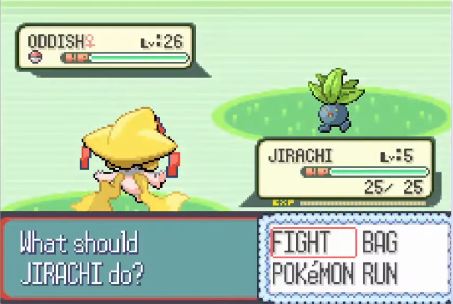
And we can see not only is the Pokemon not shiny, it's not even the correct species.
It's likely you also missed your target. We're going to have to check the Pokemons summary screen to figure out what RNG Advance we landed on. To do that, we'll have to catch it.
It's worth mentioning, if you are aiming for a Shiny and didn't get one, just use the Masterball for a catch if you have it. You will not be keeping the Pokemon, so it just speeds the process up.
Once you can view the Pokemons summary screen, we can move onto how to adjust.
Wild Adjustment
To figure out which Advance we hit, we're going to have to figure out its IVs and use that to search.
First, though, let's set up Calibration for a search.
We’ll leave Game, Console, Seed, Seed+/-, Offset, and Method alone, but we are going to change Minimum Advances. To be about 1000 advances before our target.
In my case, I am aiming for 7657. So I set it to 6657. Also set Maximum Advances to 1000 above your target. So again, in my case, this is 8657.
This will generate Pokemon spreads from 1000 Advances before your target, and 1000 after it.
Change the Pokemon to the species you caught.
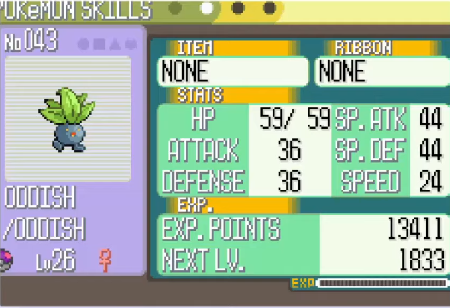
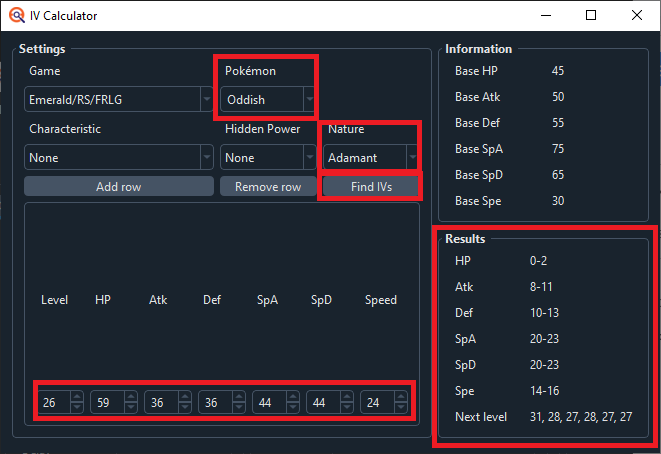
Then, set Shininess back to Any. All IVs should also be 0 to 31. Set Nature to what the Pokemon you received had. In my case it's an Adamant Oddish.
Once you select a Nature, the IV Calculator function will appear.

The IV Calculator wants you to input your Pokemons level, then stats. If it is highlighted red at all, that means you've made a typo or forgot to enter something.
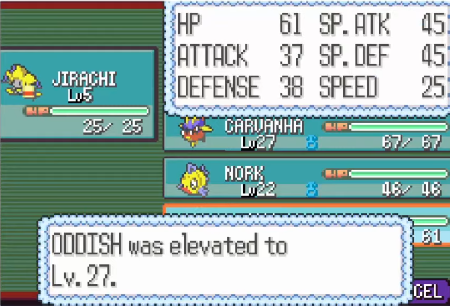
If you have Rare Candies to raise the Pokemon's level, we can make the
IV Ranges even more Precise. We aren't keeping this Pokemon, so it's
safe to use them to gain info. They will come back when we soft reset!
To account for the extra level, hit the Enter/Return button, and a new
row to enter the information for its next level will appear.
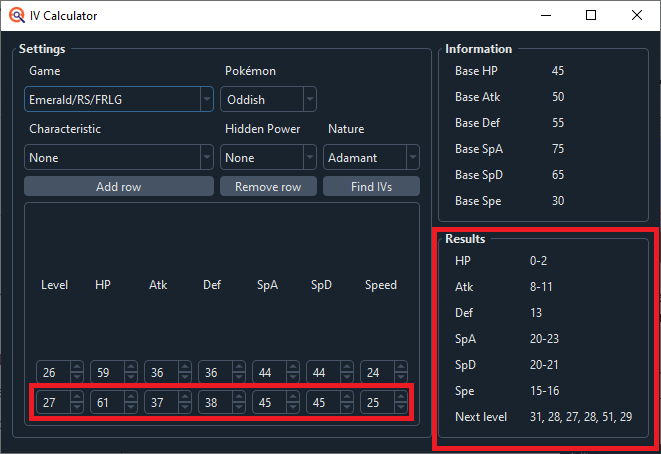
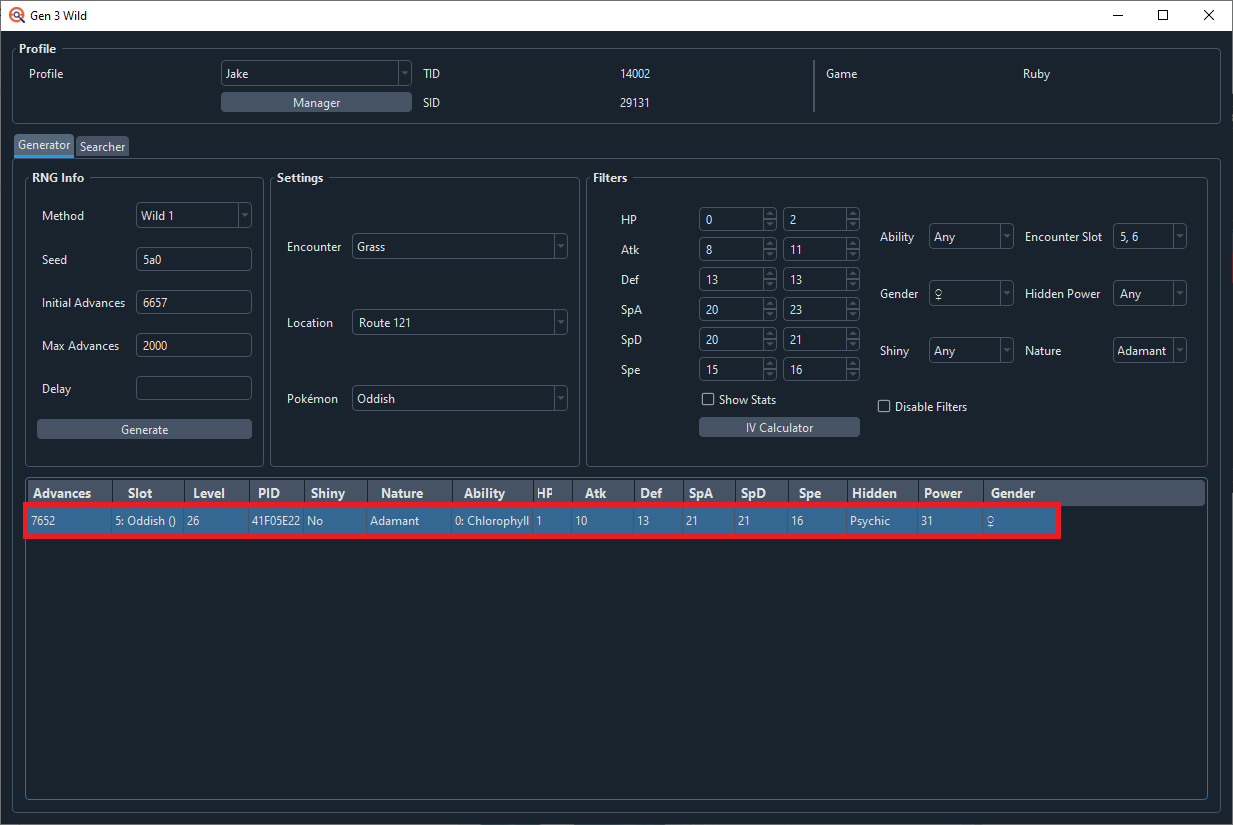
At this point, hit Submit. You should only get one result. If you get more than that, you can narrow down the results further by doing more levels in the IV Calculator.
If you do not have ANY rare candies and have more than one result, it's generally fine to assume you hit the closest Advance to your target. In my case, I only got one possibility near me.
If you have no results at all, expand your search range by decreasing Initial Advances by 1000, and increasing Maximum Advances by 1000, and click Submit again. Do this until you get at least 1 result.
If you get no results after that, there is always the chance you hit a Different Method. While rare, it can happen. Be sure to check Methods Wild 2, and Wild 4 if you get no results for THOUSANDS of Advances.
Note: Two identical results
Finding the correct Advance you landed on can be difficult if you
do not have the ability to level up your Pokemon & it is a low level
encounter. Sometimes, you will end up with a situation like this:
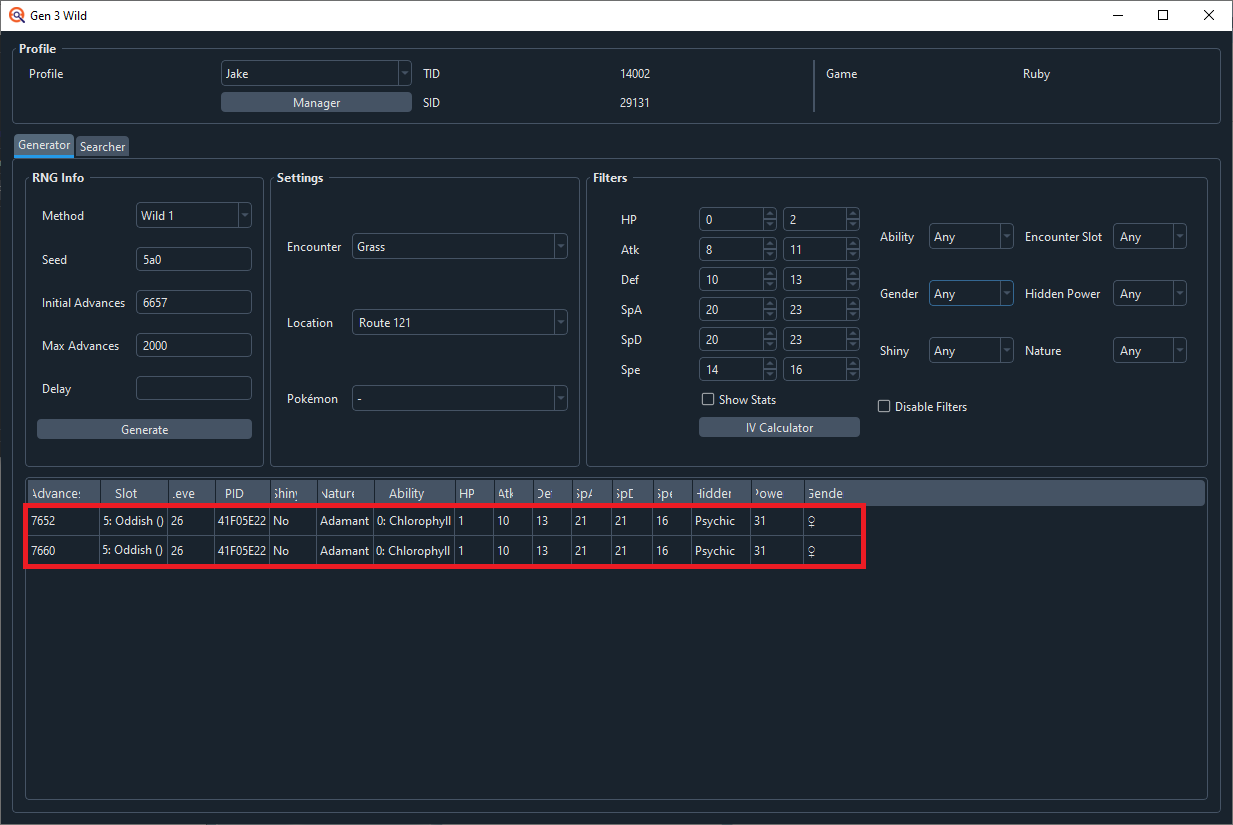
As you can see, it's impossible to tell which Oddish I received.
They are IDENTICAL. When this is the case, repeat the steps from
Wild Manip until you land on a Target where you get only one
result. This is not common, but it can happen.
Also, make sure you're looking at all the details. Species &
Level can be different while all else is identical. Just keep it in
mind.
Now we need to update Eon Timer. In the Frame Hit box, put the Advance that you determined you landed on, and click update. The calibration will change, and you can try again.
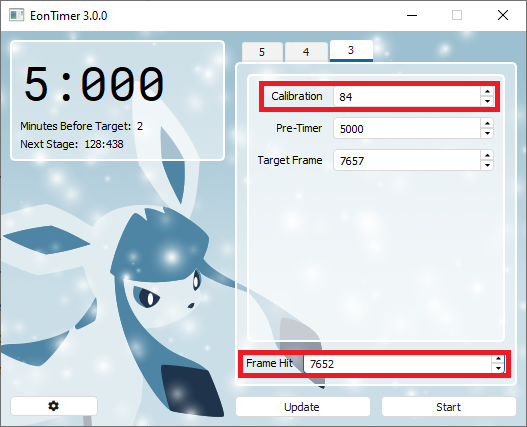
Now repeat the process from Wild Manip until you get your desired Pokemon.
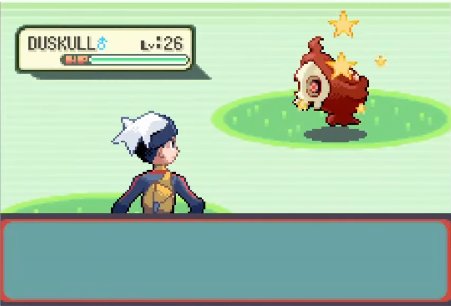
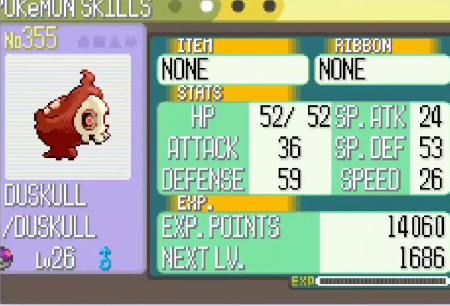
Eventually, with enough attempts, you will land on the Pokemon you are aiming for. The Duskull for this guide took me 3 attempts, including the first adjustment run.
Note: Some tips!
Remember to always check other wild methods when searching for what target you hit! If you find your results don't make sense, that could be the key!
This is really not that different from the Static RNG you should've done!
Next Steps...
Congratulations! You've finished all the Beginner RNG Manips for Ruby & Sapphire! At this point, I'd suggest delving into some more complicated subjects in our Intermediate section, or trying Pokemon Emerald, which is very similar to this.
Intermediate will contain a lot of familiar techniques showcased here, but with various different challenges. Things like Pokemon Box Ruby & Sapphire, Fishing, Rock Smash, The Safari Zone are all more challenging than these manips, while still being "Press A at Right Moment". It's other things that complicate them.
Advanced will contain extremely challenging manips with Multiple Frame Perfect Inputs, for those who want to go the extra mile to gain Perfect IV Shiny Pokemon / Very Rare Pokemon. Things like Painting RNG, Egg RNG, & WishMakr Jirachi.
Get the Pokemon you wanted? Consider supporting us on Ko-fi & keep us ad free!